Bittersweet Needle and Thread

Bittersweet Needle and Thread

Thursday, November 9, 2017

Wool Rug and Mini Rag Rug

THE RUGBEE RUG

My basket buddy, Teresa, and I were teaching basket weaving class at Silver Dollar City in Branson, Missouri, in 2000, when I happened upon a lady demonstrating making wool rugs.  She told the crowd that her grandmother had someone make the special crochet needle with a small hook on one end and a tappered blunt point at the other end.  It is ~8" long  Then she started creating lovely oval or square rugs.  


Wool strips, 1/2" to 5/8" wide, are cut and can be any length, from as small as 1" to as long as a yard.  There is no wool wasted when making this type of rug.  The width of your strips determine the thickness of the rug.  Woven wool has to be cut on the bias to prevent unraveling. I had this navy blue and red check wool from a box of fabric/notions that my grandmother gave me.


Once the strips are cut, you load the needle by pushing through the middle of the strip onto the needle with a 1/2" space between folds.  When you come to the end of one strip, you begin another strip, as if it was one continuous strip .  It is not necessary to sew these strips together because as you begin to crochet the rug they will stay in place.


Using carpet warp,  you begin to crochet between the loops, then pull off one fold, crochet, pull off a fold and repeat around the rug.  When you get to the curve part, you pull off two folds to increase the size of the rug.  This keeps it from rolling up and allows it to lay flat.    


The folds lay close together and this is the depth of the rug.  While I was watching that first demonstration, if there was a strip a bit taller that the rest, the lady took her scissors and trimmed it to be even.  I was amazed!


You can see when I separate the folds, the crotchet part is well hid.


I added a few extra colors of green and gold here and there and added a strip of black to break it up.  Notice how small the extra green and gold are.  This was my first rug and I didn't know how big it was going to be so I thought that adding extra colors would help make it a decent size.


This rug has a dreamy, fuzzy look to it and is soft to stand on.  If I had to do it over, I would not have added the extra color wool.  It was kind of hard to guess what the rug was going to look like.  From a distance it doesn't look too bad.  The size is 1.5'x2.5', not very big, but that was all the navy/red wool I had.

You can make chair cushions with this technique, rugs and hot pads to use in the kitchen.  The size depends on how much wool you have and what you are making.


~~~~~~~~~~~~~~~~


BUTTERCUP IS MAD!

When Buttercup found out that I made a small rug for Sherri's doll house, she would not talk to me. 


All she has for a rug is a worn out doily!


So I went to work on a colorful area rug for her.  I choose matching colors of her furniture that had some dynamic patterns to them.


I wove it on my small metal pot holder loom.  It matches well 
and she can place it anywhere in her 'room'.

Buttercup is soooo happy, she jumping on the bed!
(sorry for the blurry pictures.  Not sure what went wrong there.  Must be operator error!)

~~~~~~~~~~~~

 Thanks for visiting,
Cinder

Thursday, October 19, 2017

Crown Royal Quilt

OLD KING COLE'S CROWN


That's the name of the pattern I used to make this quilt from Crown Royal bags.


 I choose the pattern from a stack of quilt patterns my friend Sherri gave me that were her mother's. It was printed in the Kansas City Star newspaper in 1929. The minute I saw it I knew I wanted to use it for this quilt.

I first cut the bags all apart and found fabric that I thought would accent the gold embrodiery of the bags. The white fabric has a pale gold scroll print through it but I wasnt able to capture it in the picture.


Through trial and error, I managed to figure out each piece and made my first block.  Then I cut all the pieces out.  Soooo, when I pieced the rest of the blocks, I apparently didn't look at the original one I made, which is a bit different from the pattern.


   Oh well, who will notice.  Remember, there always needs to be a mistake in each quilt. (I think I have that part down pat!)


Looking through the fabric stores, I wasn't able to find a purple fabric to match the flannel of the bags.  I decided I would use the rest of the bags and piece them together to make the back. 


The picture doesn't show how many different shades of purple the bags are. I had so much time in making the back as I did the front!


~~~~~~~~~~~~~~~


BABY TIME
I have a co-worker who is expecting her first child. Instead of making a quilt I decided to make a quilted changing pad and bibs from fabric I had on hand.


She is having a boy so I went with darker colors on the pad incase there was an 'accident' it wouldn't show as much.  I made a small bag that it folds up into so it's easy to pack and go!


The bibs are so adorable!


~~~~~~~~~~~~~

I'm always working on many project, even one of my own vintage quilts from 1978 . Hope everyone is enjoying the fall days.  I know I am!


Thanks for visiting,
Cinder


Sunday, July 9, 2017

SUMMER FUN
This year was the first year that our Cinnamon Magnolia tree bloomed.  It didn't have lots of blooms, but they were the size of a dinner plate, with snowy white petals against the lush green leaves.


~~~~~~~~~~~~~

GIRLFRIEND WEEKEND
This year the girls arrived at my house on Father's day weekend.  It turned out to be an unusually planned, ah, not so planned, get
together we've had so far.  Everyone arriving at different time, but we still had fun.  Lots of talking, laughing and all round good time.  I gave out Strawberry Jam to very one.

Beth gave us all a box full of herbs:  Chives, Garlic Chives, Greek Oregano, Sage, French Tarragon, Thyme and Skewer Rosemary.
  They have a home in my herb bed.

Teresa gave us each a Whirlygig.  Sherri chose the Cardinal, Beth a Hummingbird, and I got the lovely green and yellow Duck!  What fun to watch his 'wings' fly around, and fly he does!  We have lots of wind here!
Sherri was our designated driver, or at least my driver.  My car was in the shop for a day and she was the first to arrive, so guess what?  She had to be the chauffeuted.  Thank you Sherri!

One of our destinations was to take a walk through The Minature and Toy Museum in Kansas City.  Amazing!  The workmanship was incredible.  Beautiful doll houses, a fully functional harpsichord, smaller than the size of a cereal bowl, and ships in bottles.  In one display there was a working loom, making a small rug.  

Hummm, that got me to thinking and Tada - I made my own 'loom'.


I used the metal frame from my vintage Loop Craft kit.  Adding Kabob Skewers and twisty ties, I strung upholstery thread over the pegs.

I cut 1/4" strips of grey wool.

Weaving was trying and I felt I was all thumbs.  Occassionally I would pull too hard and break my wool strip.  I just sewed it back together and continued on.

  
 It measures 3" by 7".  This petite rug will have a home with Sherri in one of her doll houses.

~~~~~~~~~~~~~~ 

GRANDDAUGHTER PROJECT
My seven year old granddaughter was staying with us a couple of weekends ago, and I felt it was time to 'introduce' her to sewing.  So I cut a square out of cardboard and cut slits along all the sides.  I gave her some blue yard and showed her how to weave around the slits.  After a few minutes she says, 
"Grandma, I'm going to make a cat.  Can you cut me some ears?"
  "Of course."  So I cut out 2 small ears.
"Those are to small."  So I cut bigger ones.
"Now I need a round head."  So I cut a oval head.
"How are we going to stick them together?" I ask.
"Gorilla Glue!"  Oh, yes.  Grandpa has a bottle sitting in the window ledge.  
After picking some button eyes, I went upstairs (we're in the basement) and glued on the ears and eyes, then clamped them with clothes pins.  In the meantime, she cut out cardboard for the tail and arms, adding sparkly stickers from another project.
"Now I need to make legs."
"But you already have legs."  I'm not quite seeing her full concept.
"Those are arms, Grandma!"
"Ok, ok."  I cut some legs.
Then it was assembly time. 


Her Cat!

PROJECT #2

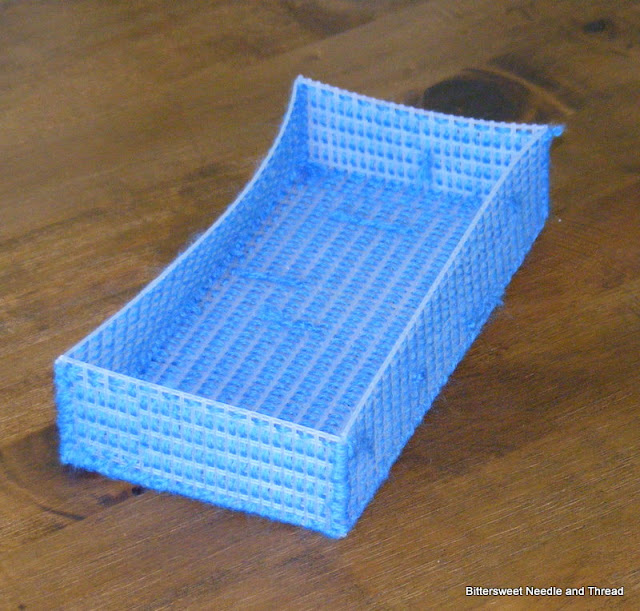
This weekend we worked on her next project, a gift for her father birthday.  I thought we could make him a small basket to hold his remotes.


We used plastic grid and blue yarn, (the same yarn in the above project.  I have a lot of it!).  Cutting the grid to the size we wanted and with lots of encouragement, we managed to get it done in one day!


She completed the 2 small sided and helped with the bottom.  I did the long sides, bottom and lashed it all together.  I know he will enjoy it!

~~~~~~~~~~~~~

Hope all our projects are this much fun!
Thanks for visiting,
Cinder


Wednesday, June 28, 2017

Dutch Girl Quilt

1960's VINTAGE QUILT


Dutch Girl


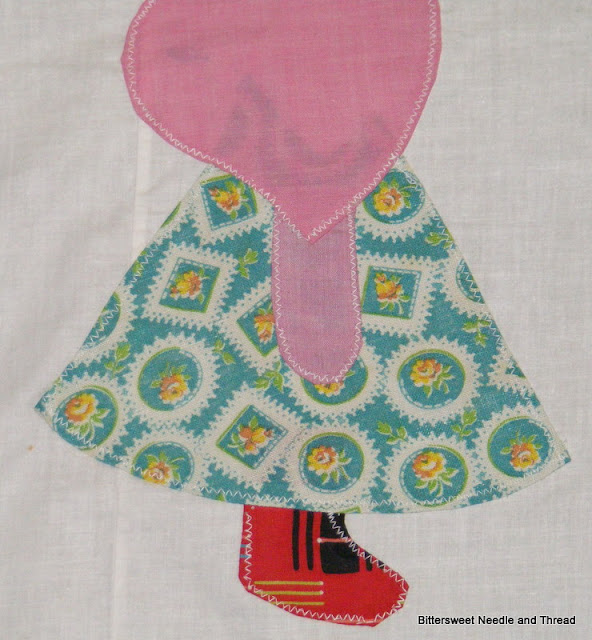
This quilt top was given to me by my sister-in-law.  Her grandmother made it for her and her other girl cousins, but never completed it.  I have several unfinished 'girls' that I can make another quilt with.  She machine appliqued each 'girl' onto white blocks. 

I love some of the fabrics, especially this dogwood print.  

This grandmother did not let convention dictate what prints she was going to put together.


You can see that she had to patch a few pieces together to make it the right size.

This block has two different fabrics sewn together.  You really only notice it when you look close.  From afar, it looks great!

I chose a teal flower print for the border and teal flannel for the back.  I felt the teal blended the other prints together and the red made a nice border.  I hand quilted it with a vine pattern.  My sister-in-law asked me to finish the quilt for my granddaugher.


~~~~~~~~~~~~~~

DOLL FURNITURE

My friend Sherri gave me this set of doll furniture for my granddaughters to play with. 

The paint is vibrant and I love the detail on each piece.

The furniture is set up on the small wash stand in my spare bedroom.  The butterfly doily was my grandmothers.  Buttercup, my fairy, is resting right now.  Please do not disturb her.
 

~~~~~~~~~~~~~~

OTHER PROJECTS

I have been busy sewing, just not getting anything completed.  My goal is to finish several projects this year, so I started on my own 40 year old Sunbonnet Sue quilt.  I shoved it back in a box due to several mistakes.  I have fixed those mistakes and I'm close to having it ready to quilt.  Also, I have started a throw quilt for my brother made from Crown Royal bags.  This one is fun!  Can't wait to show you how well it is coming along.

Thanks for visiting and have a great summer,
Cinder 

Sunday, February 26, 2017

Out with the old and in the with the not so old!

UPDATED COUCH
Now that I finished reupholstering my rocking chair, I was ready to tackle my couch.  And tackle was the right word.  Math is not my strong suit, so for several days I measured and measured to make sure that I would buy enough fabric to cover everything.  Next hurtle was to find just the perfect color to match the rocking chair and update the whole room.  I love a challenge and perservere I did!  Tape measure - scissors - roll of fabric - here I go!  I set up the sewing machine right next to the couch and set to work.  

Before picture.  I had already removed the dust ruffle from the bottom. (I swear there were a hundred staples holding it on!)  The couch was given to me in ~1995 used.  It is a very good brand and has really held up from the wear and tear of 2 sons, 6 grandchildren and 22 years of continuous use.  (It makes an extra bed when we need one.  It's very long and when the back cushions are removed, it's almost the size of a twin bed.)  The seat cushions are worn through in some places and a few stains are shattered about.  I came to me as a nice light off white color and ended as a very dingy/yellowed white.


After picture.  At first I was afraid that I chose too dark of fabric but once I got use to it, I liked it.  It freshens up the room.  I added wooden carved buttons to the center back cushions and covered the small side pillows.  The other pillow is from the same fabric that was used on the rocking chair.


It's so nice to have 'new' things in the house.  Now I just have to keep my husband from wrestling on it with the grandkids!
I also purchased a frame for my Hawaii pictures.  You can see it on the wall above the flowers.  


I hung a piece of coral on leather and a pretty Hawaiian flower from the top of the frame.  The color of the ocean is almost the same color as the fabric!

~~~~~~~~~~~~

SURPRISE GIFT

Out of the blue I received a package in the mail.  Inside was this lovely hand crochet blanket from my sister-in-law.  

She did a lovely job on it and I love all the colors.  Those cold days we had last month definately required a cover as I watched TV in the evenings.   Ahh and so soft too.  Thanks Mel!

~~~~~~~~~~~~~~

QUILT

These quilt blocks were given to me from my friend Sherri.  They were her mothers, who was a wonderful quilter.  This is a lovely star block and I loved how she used up her scrap material.  No two block are the same! 


 She always drew sew lines and followed them when she sewed.  Look at her tiny stitches!    


It turned out really pretty and I hand tied it.  The blue fabric on the back came in the same box with the blocks so I used it. 


 ~~~~~~~~~~~~

COMPUTERS!

I feel that I have negelected my and my fellow bloggers websites due to my inability to adapt to changing 'updates' on my phone hotspot and computer.  Why am I subjected to these updates?  Windows 10 - are you kidding me?  What a crock of ___.  "Take it off," I shouted to my computer guru.  "Take it off!"  "It's here to stay," he says "but I'll turn some things off so it will run better/faster."  Holy Moly!   I am from the old school that 'if it isn't broken, don't fix it'.  But NO!  Consistantly there are updates, yikes.  What's an old person to do!  
(Sorry for my few moments on my soap box.  Just venting!)  

Thanks for visiting,
Cinder